Storm Damage Roof Repair Safe Fixes and When to Call Pros
Emergency Roof Repairs After a Storm: Safe Temporary Fixes and When to Call a Pro
Last updated: September 22, 2025
Estimated reading time: 9 minutes
Key Takeaways
- Safety first. Stay alert for downed power lines, gas leaks, and structural issues. Never climb a wet or storm-damaged roof.
- Document everything from the ground. Take wide shots, close-ups, and video before moving a single item.
- Call your insurer and a trusted local roofer immediately. Emergency dry-in services help prevent further water damage and support your claim.
- Mitigate minor interior damage safely. Use buckets, towels, and fans—avoid ladders and electrical work.
- Know your coverage and warranties. Understand ACV vs. RCV, deductibles, and what “lifetime” really means in shingle warranties.
Table of Contents
- What You Need to Know First
- The Post-Storm Process: A Step-by-Step Guide
- Understanding Costs, Timelines & Warranties
- Local Considerations for Tampa Bay Homeowners
- Critical Mistakes to Avoid After a Storm
- Navigating Storm Damage Insurance Claims
- Why Tampa Bay Trusts ShingleMasters After a Storm
- Glossary of Roofing Terms
- Your Next Steps
- Sources
- Frequently Asked Questions
What You Need to Know First
After a storm, your priority is to secure your property safely and begin the recovery process without putting yourself at risk. This means a ground-level inspection, comprehensive photo/video documentation for your insurance claim, and contacting a qualified roofing professional to perform emergency dry-in services to prevent further water intrusion.
Post-Storm Homeowner Checklist
- [ ] Check for immediate hazards: downed power lines, gas leaks, or major structural damage before approaching.
- [ ] Walk the property: From the ground, visually inspect your roof for obvious signs of damage.
- [ ] Take photos and videos: Document everything before any cleanup begins.
- [ ] Inspect your attic and ceilings: Look for water stains, drips, or sagging drywall.
- [ ] Find your insurance policy: Locate your policy number and review your coverage for storm damage.
- [ ] Call your insurance agent: File a claim as soon as you have documented the initial damage.
- [ ] Call a professional roofer: Schedule an emergency inspection and temporary tarping or “dry-in.”
- [ ] Keep all receipts: Save records of any expense related to the storm damage or temporary repairs.
The Post-Storm Process: A Step-by-Step Guide
Here is a breakdown of the proven process for handling storm damage to your roof—from the first moments after the storm clears until your home is secure.
Step 1: Prioritize Safety Above All Else
Who: You, the homeowner. Duration: 15–30 minutes.
Your safety is non-negotiable. Before you think about the roof, perform a thorough safety sweep:
- Look for downed power lines. Stay at least 35 feet away and report them immediately. FEMA warns that touching a downed line can cause serious injury or death.
- Check for gas leaks. If you smell gas or hear hissing, evacuate and call 911 and your gas company from a safe distance.
- Assess structural stability. If you see sagging rooflines, cracked masonry, or leaning walls, do not enter the home.
Do not climb on your roof. A wet, damaged roof is treacherous and often unstable.
Step 2: Document All Damage from the Ground
Who: You, the homeowner. Tools: Smartphone or camera. Duration: 30–60 minutes.
This is your most important task for ensuring a fair insurance settlement. Be methodical:
- Take wide-angle shots of each side of your house to establish context.
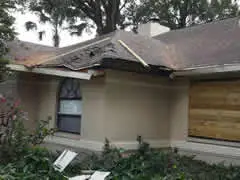
- Zoom in on specific damage: missing/lifted shingles, hail dents on gutters and vents, and visible debris.
- Photograph the ground: fallen tree limbs, loose shingles, and other debris.
- Record video: Do a slow walk-around and narrate what you see.
- Go inside: Check every room for ceiling/wall stains; inspect the attic with a flashlight for leaks or daylight through the roof deck.
Step 3: Make Two Critical Phone Calls
Who: You, the homeowner. Duration: ~30 minutes.
First: Call your insurance company’s claims hotline to report the damage; have your policy number ready. You’ll receive a claim number and next steps.
Second: Call a trusted, local roofing contractor. In Tampa Bay, you need a team that understands local storm patterns and building codes. A professional can schedule an immediate inspection and perform emergency dry-in services to prevent secondary damage.
Step 4: Perform Safe, Minor Interior Mitigation
Who: You, the homeowner. Tools: Buckets, towels, fans. Duration: Ongoing.
- Place buckets under active drips.
- Move furniture, electronics, and valuables out from under leaks.
- Use old towels to soak up water on floors.
Do not attempt ladder work or electrical repairs. If water is near outlets or fixtures, switch power off at the breaker only if it’s safe to do so.
Step 5: Schedule Your Professional Inspection and Dry-In
Who: A professional roofing contractor. Duration: 1–3 hours for the service.
Pros will perform a full inspection—often with drones for safety—and install heavy-duty tarps or synthetic underlayment to dry-in the roof, stopping additional water intrusion. This is often required by insurance policies as part of your duty to mitigate further damage.
Understanding Costs, Timelines & Warranties
Emergency tarping can range from a few hundred dollars to over a thousand, depending on roof size and complexity. A full roof replacement is a major project, with costs driven by materials, roof size, and labor.
Understand warranties: a material warranty (manufacturer) covers defects in the products, while a workmanship warranty (contractor) covers installation errors. Be wary of contractors who don’t offer a solid workmanship warranty.
“Lifetime” warranty clarity: The GAF Shingle & Accessory Limited Warranty defines “lifetime” as “for as long as you, the original owner… own the property where the shingles… are installed.” It is not the life of the structure and is often prorated after an initial period.
Common Roofing Material Comparison
| Material | Typical Wind Rating | Impact Class | Typical Warranty | Typical Cost Range (per sq. ft. installed) |
|---|---|---|---|---|
| Architectural Shingles | 110–130 mph | Class 3 or 4 | 25–50 years (Prorated) | $5.50 – $9.50 |
| Metal (Standing Seam) | 140+ mph | Class 4 | 40–70 years | $10.00 – $20.00+ |
| Concrete/Clay Tile | 125–150 mph | Class 3 or 4 | 50+ years | $12.00 – $25.00+ |
Sources: GAF, Owens Corning, Florida Building Code. Costs are estimates for 2023 and vary by region and project complexity.
Local Considerations for Tampa Bay Homeowners
Tampa Bay’s hurricane and tropical storm exposure shapes local codes and roofing practices. Florida’s building code is among the nation’s strongest—especially the HVHZ for Miami-Dade and Broward. While Tampa Bay (Hillsborough, Pinellas, Pasco) is not in the HVHZ, requirements are still stringent.
The Florida Building Code dictates specific nailing patterns, underlayment, and wind-resistance standards. If repairs/replacement affect 25% or more of the roof, the entire system must be brought up to current code. You can verify permits with local authorities like Hillsborough County Building Services and Pinellas County Building and Development Review Services.
Common regional roof types—from South Tampa to Clearwater and St. Pete—include high-wind-rated asphalt shingles, standing seam metal, and concrete/clay tile for durability against wind, rain, and sun.
Critical Mistakes to Avoid After a Storm
- Do not climb on your roof. It may be unstable, slippery, and dangerous. The Occupational Safety and Health Administration (OSHA) identifies falls as the leading cause of death in construction.
- Do not sign a contract under pressure. Avoid out-of-town “storm chasers.” Vet local, licensed, and insured companies.
- Do not pay in full upfront. A reasonable deposit is standard; pay the balance after satisfactory completion.
- Do not attempt electrical repairs. Call a licensed electrician if water contacted electrical systems.
- Do not discard damaged items until your adjuster has seen them, including shingles found in your yard.
Navigating Storm Damage Insurance Claims
The process can feel overwhelming, but it follows a logical path. Your contractor cannot act as a public adjuster, but they can provide detailed estimates and documentation to support the scope of work.
- Initial Claim: You file and receive a claim number.
- Adjuster Visit: The insurer’s adjuster inspects damage.
- Scope of Loss: The adjuster creates a report and estimate.
- Contractor Review: Your contractor verifies accuracy; discrepancies are addressed via a supplement with supporting evidence.
- First Check (ACV): Insurer releases Actual Cash Value (replacement cost minus depreciation).
- Repairs: Contractor completes approved work.
- Final Invoice & Certificate of Completion: Submitted to the insurer.
- Final Check (Depreciation): Remaining funds released so you can pay your contractor in full.
Disclaimer: This is not legal or insurance advice. Verify coverage and procedures directly with your insurance carrier.
Your Insurance Verification Checklist
- What is my policy number and claim number?
- What is my deductible for wind or hurricane damage?
- Does my policy cover a full roof replacement or prorated repairs?
- What is the deadline for filing a claim?
- Am I required to use a specific contractor, or can I choose my own?
- What documentation do you need from me and my contractor?
- Is my policy “ACV” (Actual Cash Value) or “RCV” (Replacement Cost Value)?
Why Tampa Bay Trusts ShingleMasters After a Storm
When a storm hits, you need more than a roofer—you need a rapid-response partner who knows Tampa Bay’s weather, homes, and codes. ShingleMasters Roofing is that partner. Our crews work safely and efficiently in post-storm environments, prioritizing emergency dry-in services to protect your home.
We navigate local codes and insurance processes daily. Our detailed, evidence-based estimates help insurers approve a fair, complete scope of work.
- Certified Installers: Manufacturer-certified teams to ensure top-quality installations and valid material warranties.
- Safety First: Strict OSHA protocols protect our crews and your property.
- Transparent Process: Clear communication from inspection through final walkthrough.
- Superior Cleanup: Specialized equipment to protect landscaping and leave your property spotless.
- Flexible Financing: Options to help manage out-of-pocket costs like deductibles.
- Ironclad Warranties: Robust workmanship coverage that complements manufacturer guarantees.
From emergency repairs to full replacement, our team helps restore your peace of mind. Explore our storm damage and roof repair services for more information.
Glossary of Roofing Terms
- Class 4 Impact Rating: Highest rating for impact resistance (e.g., hail) under the UL 2218 standard.
- Dry-In: Applying a temporary waterproof covering (tarp or synthetic underlayment) to prevent water intrusion.
- Ice & Water Shield: Self-adhering membrane at eaves, valleys, and penetrations to protect against ice dams and wind-driven rain.
- O&P (Overhead and Profit): Standard estimate line item (typically 10% overhead + 10% profit) covering a contractor’s business costs.
- Ridge Vent: Exhaust vent along the ridge allowing warm, moist air to escape the attic.
- Underlayment: Felt or synthetic layer between roof deck and shingles serving as a secondary water barrier.
Your Next Steps Are Clear
The aftermath of a storm is stressful, but you don’t have to face it alone. Protect your home and your investment by taking the right steps, right away.
If you only do 3 things…
- Stay Safe: Do not climb on your roof. Perform your initial inspection from the ground.
- Document Everything: Take photos and videos of all damage before anything is moved or repaired.
- Call a Pro: Contact ShingleMasters Roofing now to schedule your free, no-obligation storm damage assessment and secure your home.
[Schedule Your Free Storm Damage Inspection Today]
Sources
- Roofing – A Guide for Consumers — Florida Department of Business and Professional Regulation
- GAF Shingle & Accessory Limited Warranty — GAF
- Protecting Your Home from Flood Damage — Federal Emergency Management Agency (FEMA)
- Construction – Fall Protection — Occupational Safety and Health Administration (OSHA)
- UL 2218: Standard for Impact Resistance of Prepared Roof Covering Materials — Underwriters Laboratories
- Florida Building Code, 7th Edition (2020), Chapter 15: Roof Assemblies and Rooftop Structures
Frequently Asked Questions
How long does an emergency roof tarping take?
A professional crew can typically complete an emergency dry-in or tarping service on a standard single-family home in 1 to 3 hours. The goal is to quickly and safely cover damaged areas to prevent water from entering while you arrange permanent repairs.
My roof isn’t leaking. Do I still need an inspection after a hail storm?
Yes. Hail damage is often subtle and may not cause immediate leaks. Hail can fracture the shingle mat, creating bruises that compromise integrity and shorten lifespan. An inspection is the only way to be sure.
Can I just repair my roof instead of replacing it?
Sometimes. Minor, isolated damage may be repairable. But if damage is widespread, shingles are old/brittle, or if codes require it, a full replacement may be the only responsible option for long-term roof integrity.
How much does a post-storm roof inspection cost?
Most reputable roofing contractors, including ShingleMasters Roofing, offer a comprehensive post-storm inspection and damage assessment at no cost. You’ll also get documentation to support your insurance claim.
What is a Class 4 impact rating and is it worth it in Florida?
Class 4 is the highest impact-resistance rating under UL 2218. Tampa Bay sees more wind than severe hail, but Class 4 shingles can offer superior durability and may qualify you for homeowner’s insurance discounts.
What if my insurance company’s estimate is lower than my contractor’s?
This is common. Adjusters often use standardized pricing that may miss local material costs, code requirements, or complex labor. A professional contractor will submit a detailed supplement with photos and applicable codes to justify the difference.


